• その他のフルークグループ:
  • Fluke
  • Fluke Biomedical
  • Fluke Networks
  • Fluke Process Instruments
フルークブランドをさらに表示
Accelix Amprobe Beha-Amprobe Comark Emaint Landauer Pacific Laser Systems Pomona RaySafe Schad
ホーム
Precision, Performance, Confidence.
フルーク・キャリブレーション - Fluke Calibration Japan
  • 登録
  • ログ・イン
  • Contact Us

JP - Japanese (日本語) [Change]


Introduction to the ISO Guide to the Expression of Uncertainty of Measurement (GUM)

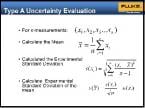
Slide Representing Gum

When an instrument is calibrated, the measurements should be traceable back to a common standard such as the international system of units (SI). By definition, one cannot have a traceable measurement without uncertainty, which means we have to estimate it and communicate it in each step of the traceability chain. If traceability is important to you, then you must be able to understand and quantify uncertainty.

Estimating measurement uncertainty is one of the most challenging tasks that metrologists and calibration technicians face. The ISO Guide to the Expression of Uncertainty in Measurement (GUM) was produced in 1993 by the Comite international des Poids et Mesures (CIPM) and the International Bureau of Weights and Measures (BIPM) as ISO/IEC Guide 98.

The GUM was developed to

  • Provide rules on the expression of measurement uncertainty
  • Promote full information on how the uncertainty statements are arrived at
  • Provide a basis for the international comparison of measurement results

All calibration laboratories around the world use the GUM method to estimate measurement uncertainty. You can download it here: https://www.bipm.org/en/publications/guides/

Here is an overview of the GUM 8-step process for calculating uncertainty:

  1. Describe the measured value in terms of your measurement process.
  2. List the input quantities.
  3. Determine the uncertainty for each input quantity.
  4. Evaluate any covariances/correlations in input quantities.
  5. Calculate the measured value to report.
  6. Correctly combine the uncertainty components.
  7. Multiply the combined uncertainty by a coverage factor.
  8. Report the result in the proper format.

If you would like more information on this topic, you may watch a recorded version of a webinar I presented:

What you will learn in this on-demand, recorded web seminar

Estimating measurement uncertainty is one of the most challenging tasks that metrologists and calibration technicians face. This web seminar introduces you to the ISO Guide to the Expression of Uncertainty in Measurement (GUM). The GUM document was produced in 1993 in order to have a standard way to compute and communicate measurement uncertainty. All calibration laboratories around the world use the GUM method to estimate measurement uncertainty. We’ll provide information on the history of the GUM’s development and the fundamental concepts of the GUM. This web seminar is intended for calibration technicians, new metrologists or metrology engineers. The information presented provides a foundation for other Fluke Calibration web seminars that present measurement uncertainty analyses for specific calibration applications.

Register for the on-demand version of this web seminar »

Jeff Gust, Chief Corporate Metrologist at Fluke Corporation
Posted by Jeff Gust on 1月 08, 2016
Jeff Gust is the Chief Corporate Metrologist for Fluke Corporation. He is a recognized member of the international metrology community, holding active roles with several leading professional organizations. Jeff has authored numerous technical papers on various metrology topics, is a recognized... Full Bio
  • ログイン(登録)してコメントを投稿
  • Printer-friendly version »
  • ホーム
  • 製品
    • 新製品情報
    • 電気校正
      • 電気標準器
      • 電気校正器
      • ベンチ・マルチメーター
      • 電気校正ソフトウェア
    • RF 校正
      • RF リファレンス・ソース
      • RF 校正アクセサリー
      • RF 校正ソフトウェア
    • データ収集とテスト装置
      • ベンチ・マルチメーター
      • データ収集
      • データ収集ソフトウェア
    • 温度校正
      • ITS-90 温度標準器
        • ITS-90 定点セル
        • 標準白金抵抗温度計(SPRT)
        • メンテナンス装置
        • 液体窒素式比較校正装置
        • 抵抗ブリッジ
        • 標準抵抗器
      • 校正バス
        • 小型校正バス
        • 標準バス
        • 特殊アプリケーション用バス
        • バス用アクセサリー
        • バス・コントローラー
        • バス用温度媒体
      • 工業用温度校正器
        • フィールド・メトロロジー・ウエル
        • メトロロジー・ウェル
        • ハンドヘルド・ドライウェル校正器
        • フィールド・ドライウエル
        • 超小型バス
        • 赤外線校正器
        • 熱電対炉
        • デュアル・ブロック・ドライウエル
        • ゼロ点ドライウエル
      • プローブ/センサー
        • 白金抵抗温度計 (PRT)
        • サーミスター
        • 標準熱電対
      • デジタル温度指示計
      • マルチファンクション校正器
      • 温度校正ソフトウェア
    • 湿度校正
      • 湿度校正器
      • 湿度データ・ロガー/モニター
    • 圧力校正
      • ピストン・ゲージ
        • NMI ピストン・ゲージ
        • 絶対圧ピストン・ゲージ
        • 高圧力ガス・ピストン・ゲージ
        • 油圧式ピストン・ゲージ
        • ピストン・ゲージ用アクセサリー
      • 圧力コントローラー/校正器
        • 低圧力コントローラー/校正器
        • 空気式圧力コントローラー/校正器
        • 高圧空気式コントローラー/校正器
        • 油圧式コントローラー/校正器
      • 圧力モニター
        • 低圧力計
        • デジタル圧力計
        • 基準圧力モニター
      • 重錘形圧力計
        • 空気式デッドウェイト・テスター
        • 油圧式デッドウェイト・テスター
        • 液圧式デッドウェイト・テスター
        • 高圧油圧式デッドウェイト・テスター
        • デッドウェイト・テスター用アクセサリー
      • 手動校正器、モニター
        • 圧力校正器
        • 空気圧の制御
        • 液体圧比較器/ポンプ
      • Handheld Pressure Calibrators
      • エア・データ・テスト
      • ラボ環境モニター
      • 圧力校正アクセサリ
      • 圧力校正カスタム・システム
      • 圧力校正ソフトウェア
    • 流量校正
      • 気体流量標準器
      • 気体流量アクセサリ
      • GFS 質量流量一次標準
      • 流量校正ソフトウェア
    • プロセス校正ツール
      • 温度校正器
        • ハンドヘルド温度校正器
        • ドライブロック校正器およびマイクロバス
        • 高精度デジタル温度計
        • 温度プローブ
        • 赤外線温度計校正器
        • データ・ロギング機能付き湿温度計
      • 圧力校正器
        • デジタル圧力校正器
        • ハンドヘルド圧力校正器
        • 重錘形圧力計
        • 高精度デジタル圧力計
        • 校正用ハンド・ポンプ
      • マルチファンクション校正器
      • mA ループ校正器
      • プロセス校正ソフトウェア
    • 校正ソフトウェア
      • MET/CAL ソフトウェア
      • MET/CAL Support
      • 資産管理ソフトウェア
      • 温度校正ソフトウェア
      • 圧力校正ソフトウェア
      • 流量校正ソフトウェア
      • 機械/寸法校正ソフトウェア
    • サービスとサポート
    • すべての校正機器
  • ご購入について
    • 購入窓口
    • 見積依頼
    • デモ依頼
    • 相談/問い合わせ
    • Certified Pre-Owned Equipment
    • General Services Administration (GSA)
    • Financing Program
    • National Stock Numbers (NSNs)
    • Payment Options and Tax Info
  • ニュース
    • プレスリリース
    • プロモーション
    • 業界リンク
    • Metrology Salary Survey
  • トレーニングとイベント
    • 展示会/セミナー
    • トレーニング・コース
    • User Group Meetings
    • ウェブセミナー
      • ライブ・セミナー
      • 過去のセミナー(アーカイブ)
  • カタログ・資料
    • Education Hub
    • About Calibration
    • 参考資料
    • 製品資料
    • 製品マニュアル(ユーザー・ガイド)
    • Videos and Virtual Demos
    • Blog
  • サービスとサポート
    • Service Request (RMA)
    • Service Plans
    • ナレッジベース
    • 認定校正
    • サービスセンター
    • Calibration Certificates
    • Community Forum
    • My MET/SUPPORT
      • Activate
      • Procedures
      • Software
      • Technical Bulletins
      • Priority Support
      • Manuals
    • 製品マニュアル(ユーザー・ガイド)
    • 安全データ・シート(SDS)
    • 安全性および製品に関するお知らせ
    • ソフトウェア・ダウンロード
  • フルーク・キャリブレーション
    • お問い合わせ先
    • 所在地
    • キャリア
    • フルーク・キャリブレーションとは
      • Hart Scientific:温度校正
      • DH Instruments:圧力/流量校正
      • Pressurements:圧力校正
      • Ruska:圧力校正
    • 関連企業
    • 行動規範とコンプライアンス
    • よくある質問
ホーム|Blog|Introduction to the ISO Guide to the Expression of Uncertainty of Measurement (GUM)
©1995-2022 Fluke Corporation
             

Secondary menu

  • 免責事項
  • プライバシー・ステートメント
  • Terms of Use
  • Terms and Conditions of Sale